
On this page
You’ve approved the quote, the start date is locked in, and your commercial development is about to get a new asphalt surface. But what actually happens between that first excavator rolling onto site and the final quality sign-off?
For developers and engineering firms managing projects across Sydney, understanding the asphalt paving process involves knowing what to expect, when to ask questions, and how to identify quality workmanship.
Here’s exactly how professional asphalt paving specialists transform a construction site into a durable commercial pavement.
Key Insights
- Commercial asphalt paving involves 8 distinct phases, from pre-construction planning through final quality assurance
- Proper sub-base preparation is the single most critical factor for pavement longevity – this is where most failures originate
- Quality commercial projects include multiple testing and validation stages that residential work often skips
- Timeline for a mid-sized commercial car park: typically 1-2 weeks, weather dependent
- Australian Standards compliance (particularly TfNSW specifications for Sydney projects) governs material selection, testing methods, and quality thresholds
Phase 1: Pre-Construction Planning and Coordination
Before any machinery arrives, experienced contractors conduct detailed site planning. This phase separates professional commercial paving from rushed residential work.
Your contractor should provide a project schedule accounting for material deliveries, weather windows, and site access coordination. For commercial developments, phasing the work to minimise disruption is often essential, particularly if tenants are already operating or if the site connects to active roadways.
In Sydney, weather plays a bigger role than you might expect. Asphalt requires minimum temperatures for proper compaction (usually above 10°C), and rain delays are common during winter months. Smart contractors schedule paving for spring through autumn when conditions are most reliable.
Phase 2: Demolition and Existing Surface Removal
First step on the ground: removing what’s there. Heavy machinery breaks up and hauls away old asphalt, concrete, or failing pavement layers.
For commercial projects, this is crucial for identifying and addressing underlying problems. If the existing pavement failed due to poor drainage or unstable subgrade, simply paving over the top guarantees the same issues will return.
The excavation depth depends on your project’s requirements and the existing base condition. Commercial applications handling heavy vehicle traffic typically require deeper excavation to accommodate thicker base layers.
Phase 3: Grading and Drainage Design
This step often gets underestimated, yet it’s where pavement longevity is either built in or sacrificed.
Grading involves shaping the subgrade to achieve proper water runoff. Water is asphalt’s biggest enemy. If it pools on the surface or seeps into the base layers, you’re looking at premature cracking, potholes, and structural failure.
Professional contractors use laser-guided grading equipment to ensure consistent fall across the entire surface. For Sydney commercial projects, the typical grade is 1-2% (10-20mm fall per metre), directing water toward designated drainage points.
Large commercial sites often require catch basins, stormwater drains, or kerb and gutter systems, not just surface slope. Your contractor should have designed these elements during the planning phase, not improvised them during construction.
Phase 4: Sub-Base Construction and Compaction
Here’s where pavement strength is actually built. The sub-base layer (typically crushed aggregate or road base) provides structural support and acts as a frost barrier (less critical in Sydney’s climate, but still relevant for thermal movement).
For commercial applications in Sydney, base thickness typically ranges from 150-300mm, depending on the expected traffic loads and soil conditions. Heavy vehicle access areas might require even deeper bases with additional reinforcement.
Proper compaction is non-negotiable. Using heavy roller equipment, contractors compact the aggregate base in layers (also known as lifts) to achieve the specified density. Under-compacted bases will settle over time, causing the asphalt surface to crack and deform.
Phase 5: Proof Roll and Sub-Base Validation
Professional commercial contractors don’t skip this step, but residential paving companies often do.
A proof roll involves driving a loaded heavy vehicle (typically a quad-axle truck carrying 20+ tonnes) across the entire prepared base. The contractor watches for excessive flexing or movement. If the base moves more than about 25mm under the truck’s weight, it’s not adequately supported.
Soft spots are remedied immediately with additional base material, deeper excavation, or soil stabilisation, depending on what’s causing the weakness. This quality check prevents future pavement failures and is worth every minute it adds to the schedule.
Testing at this stage aligns with Transport for NSW’s specifications for commercial pavement projects. For projects requiring formal documentation, contractors may also conduct density testing using nuclear gauges or sand replacement methods.
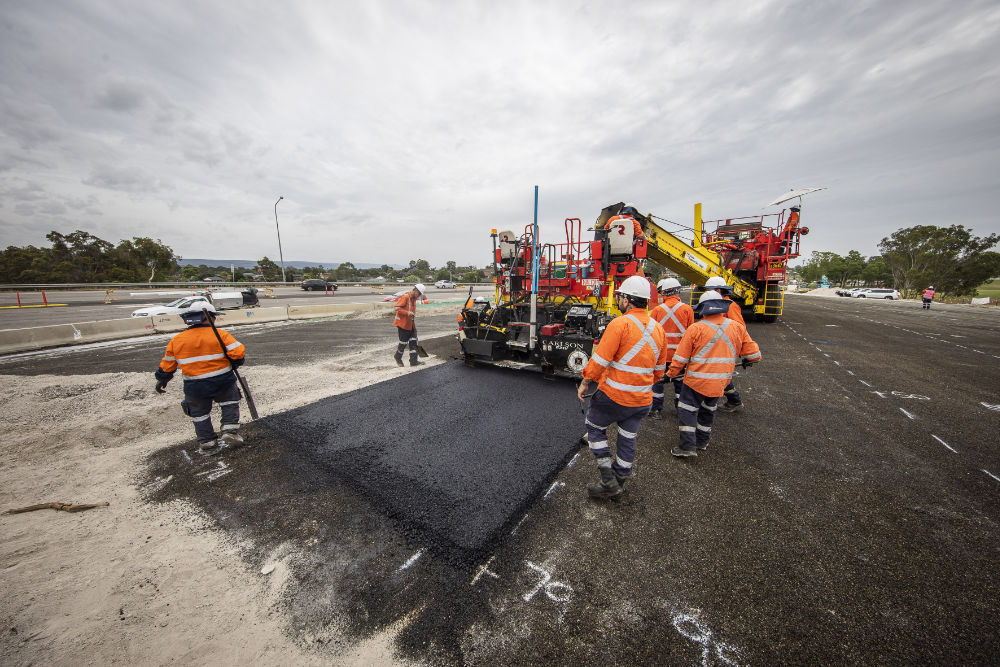
Phase 6: Tack Coat and Binder Layer Application
Before the asphalt layers are laid down, a tack coat (thin bitumen emulsion) is applied to ensure proper bonding between the base and the first asphalt layer.
The binder layer is the structural asphalt layer. It’s made with a coarser asphalt production process using larger aggregate and is typically 40-75mm thick for commercial applications.
Fresh asphalt arrives from the plant at around 150-170°C. Timing and coordination matter here – asphalt can’t sit in trucks for hours or it cools below workable temperature. This is why commercial projects require careful scheduling of plant production and delivery windows.
The asphalt is laid using a mechanical paver that spreads and initially compacts the material to a uniform depth. Paver operators constantly monitor thickness, temperature, and material flow.
Phase 7: Surface Course Installation
The surface course is what you actually see and drive on. It uses a finer asphalt mix designed for smoothness, durability, and weather resistance.
For commercial projects in Sydney, the surface course is typically 25-40mm thick. The specific mix design depends on the expected traffic type and volume.
Heavy-duty applications might use polymer-modified binders or specialty mixes that resist deformation under turning traffic (common in car parks). These decisions should have been made during the design phase based on Australian Standard AS 2008 binder classifications.
Application technique matters. Experienced crews maintain consistent paver speed, proper overlap at joints, and careful handling around edges, kerbs, and transitions to existing surfaces.
Phase 8: Compaction, Cooling, and Final Quality Checks
Multiple passes with heavy roller equipment compact the asphalt to the specified density (typically 95-98% of laboratory density). Compaction must occur while the asphalt is still hot enough to compress but cool enough to hold its shape – a narrow temperature window that demands experienced operators.
Commercial projects often include density testing to ensure compaction meets specifications. This involves extracting core samples and measuring their density against design standards, which is why asphalt testing matters: for quality assurance.
The new pavement needs 24-48 hours before it can handle regular traffic, and full strength develops over several weeks as the asphalt continues to cure. Your contractor should provide clear guidance on when different areas can be opened to traffic, deliveries, or heavy equipment.
Line marking, signage, and final site cleanup typically happen after the asphalt has cooled and cured sufficiently – usually 3-7 days depending on weather conditions.
What Should Commercial Clients Expect?
- Communication touchpoints: Professional contractors provide regular updates at each completion phase, notify you immediately if issues arise, and coordinate with your site team to minimise disruption.
- Timeline flexibility: Weather delays happen. Build buffer time into your overall project schedule, particularly for paving scheduled during wetter months.
- Quality documentation: For commercial projects, expect test results, material certifications, and as-built documentation showing what was actually constructed versus what was designed.
- Site access coordination: Discuss delivery schedules, equipment movement, and traffic management requirements upfront.
If you’re planning a commercial development that requires asphalt work, working with an experienced contractor who understands the technical requirements and the commercial project realities makes the difference between a pavement that lasts 15 years and one that needs repairs within three years.
At Kypreos Group, we’ve been delivering commercial asphalt projects across Sydney for over three decades. Our team manages everything from initial design consultation to final quality testing, with full compliance to Australian Standards and Transport for NSW specifications. We also offer specialised asphalt milling services for projects requiring existing surface removal. Read more about the importance of asphalt milling in our detailed guide.
For developers and engineering firms managing tight deadlines and quality expectations, our integrated approach (handling both asphalt production and installation in-house) means better coordination, consistent quality, and fewer moving parts to manage.
Talk to the Kypreos Group team about asphalt paving, spray seal, road profiling and asphalt testing across Greater Sydney.


